> ## Documentation Index
> Fetch the complete documentation index at: https://docs.ipmideck.com/llms.txt
> Use this file to discover all available pages before exploring further.
# Supermicro
> Supermicro IPMI 2.0 BMC (X8–X12 보드)에서 웹 인터페이스 또는 BIOS를 통해 IPMI over LAN을 구성합니다. 낮은 신뢰도, 사용 전에 하드웨어에서 검증하세요.
**낮은 신뢰도 가이드, 이 단계에 의존하기 전에 하드웨어에서 검증하세요.**
Supermicro BMC 펌웨어는 보드 세대 (X8부터 X12까지) 간에 상당히 다릅니다.
아래의 스크린샷은 오래된 Supermicro BMC와 BIOS의 것입니다. 탐색 경로를 출발점으로
취급하고, 자신의 보드에 대해 확인하고, 수정 사항을 보고하세요. 소유자 하드웨어
검증은 보류 중입니다.
**적용 대상:** IPMI 2.0 BMC가 있는 Supermicro 서버 (X8 / X9 / X10 / X11 / X12 보드).
Supermicro는 ipmideck와 **실험적**입니다. IPMI 2.0은 작동하지만 아직 철저히 테스트되지
않았습니다. 대부분의 Supermicro 보드에서 **IPMI over LAN은 기본적으로 활성화**되어 있습니다.
주요 작업은 웹 인터페이스에서든 BIOS에서든 BMC에 도달 가능한 LAN 주소를 부여하는 것입니다.
## 옵션 A: BMC 웹 인터페이스에서
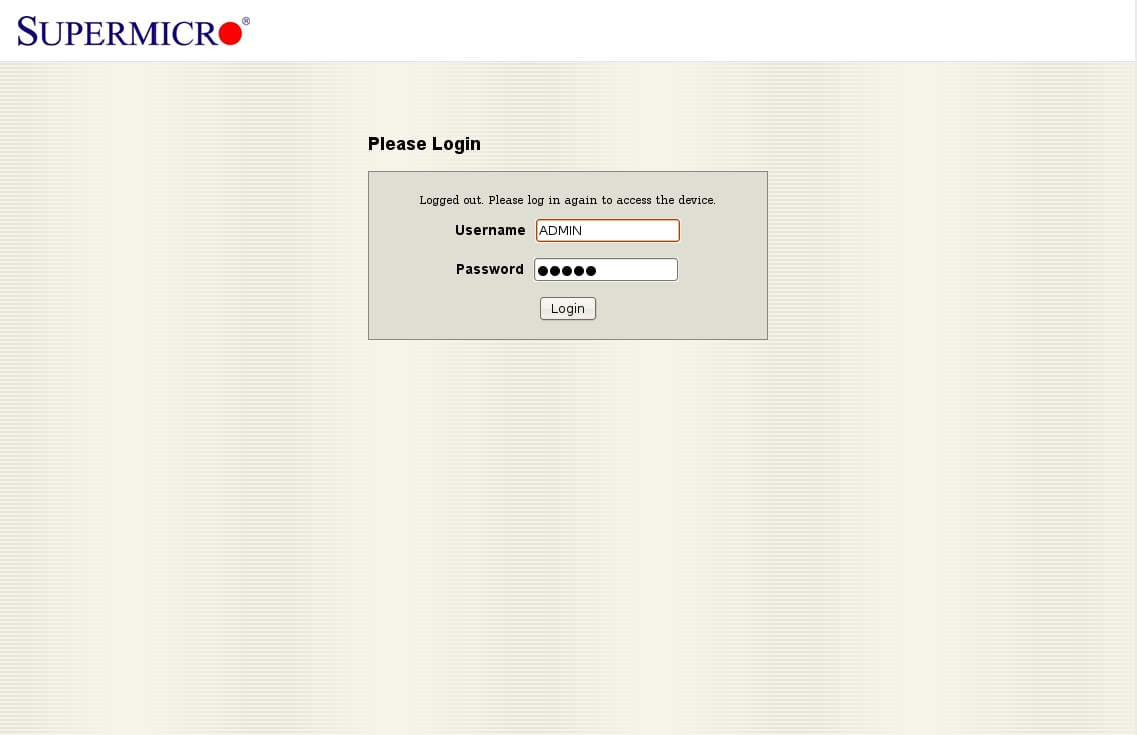
브라우저에서 BMC IP 주소로 이동합니다. 기본 자격 증명은 **ADMIN** / **ADMIN**입니다.
첫 접근 후 즉시 변경하세요.
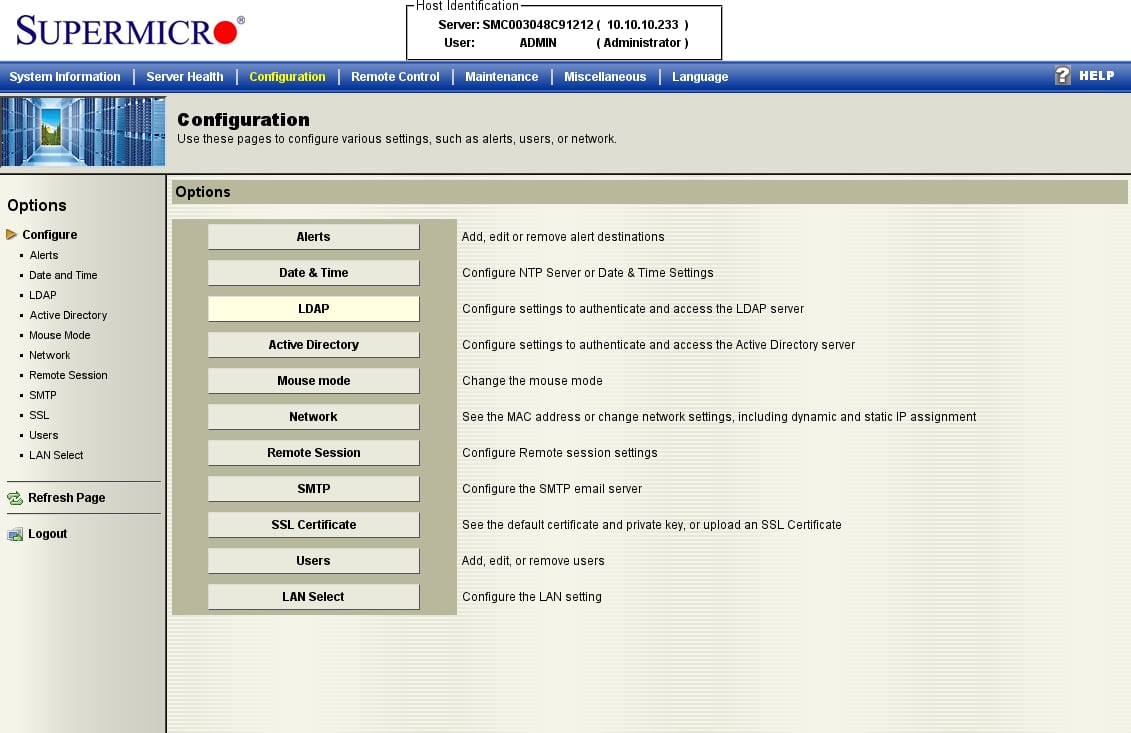
 **Configuration** 탭을 열고 옵션 목록에서 **Network**를 선택합니다. (이 오래된 펌웨어는
모든 것을 *Configuration* 아래에 묶습니다. 새 보드는 그것을 *Network → Network Settings*로
레이블할 수 있습니다.)
**Configuration** 탭을 열고 옵션 목록에서 **Network**를 선택합니다. (이 오래된 펌웨어는
모든 것을 *Configuration* 아래에 묶습니다. 새 보드는 그것을 *Network → Network Settings*로
레이블할 수 있습니다.)
 **Obtain an IP address automatically (DHCP)** 또는 **Use the following IP address**를 선택하고
정적 IP, 서브넷 마스크, 게이트웨이를 입력한 다음, **Save**를 클릭합니다. IPMI over LAN은
기본 채널에서 이미 활성 상태이며, 이는 단지 BMC를 도달 가능하게 만들 뿐입니다.
**Obtain an IP address automatically (DHCP)** 또는 **Use the following IP address**를 선택하고
정적 IP, 서브넷 마스크, 게이트웨이를 입력한 다음, **Save**를 클릭합니다. IPMI over LAN은
기본 채널에서 이미 활성 상태이며, 이는 단지 BMC를 도달 가능하게 만들 뿐입니다.
 ## 옵션 B: BIOS에서
BMC에 아직 주소가 없으면, BIOS에서 설정합니다. POST 중에 **DEL**을 눌러 BIOS 설정
유틸리티로 들어갑니다.
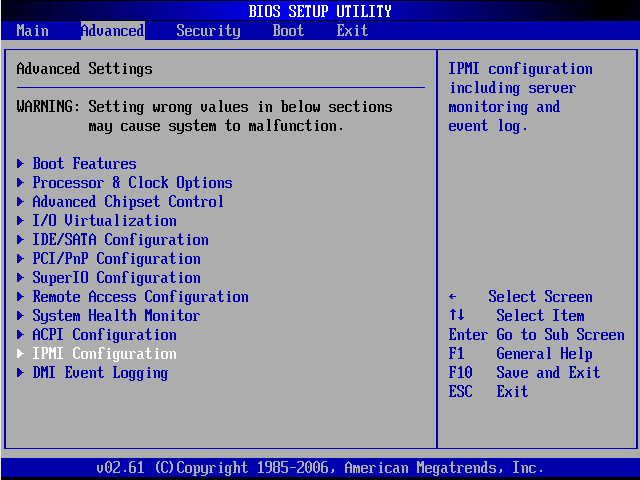
**Advanced** 탭에서 **IPMI Configuration**을 엽니다.
## 옵션 B: BIOS에서
BMC에 아직 주소가 없으면, BIOS에서 설정합니다. POST 중에 **DEL**을 눌러 BIOS 설정
유틸리티로 들어갑니다.
**Advanced** 탭에서 **IPMI Configuration**을 엽니다.
 **Status Of BMC: Working**을 확인한 다음, **Set LAN Configuration**을 엽니다.
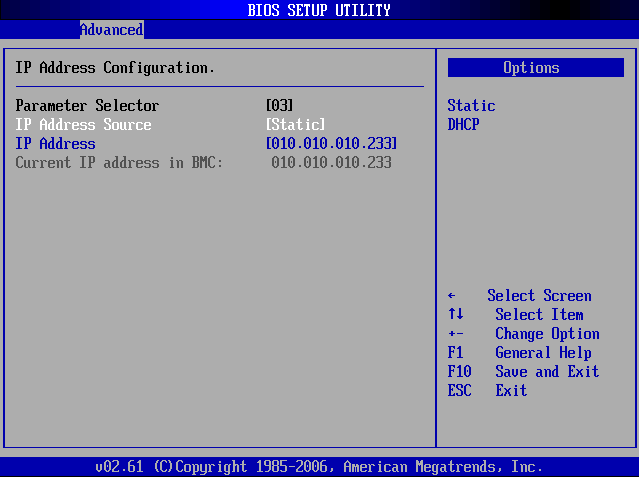
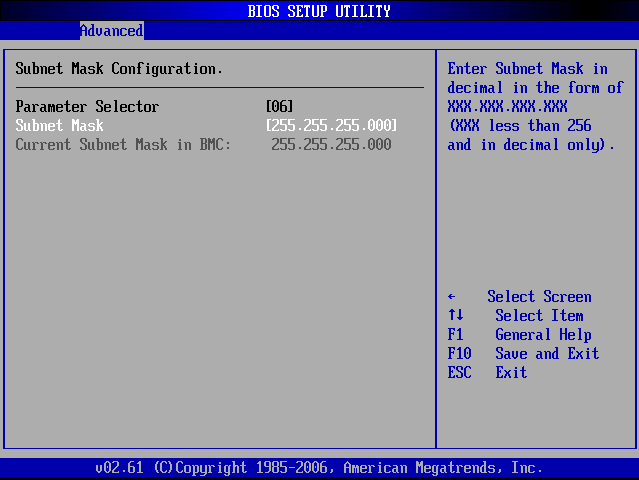
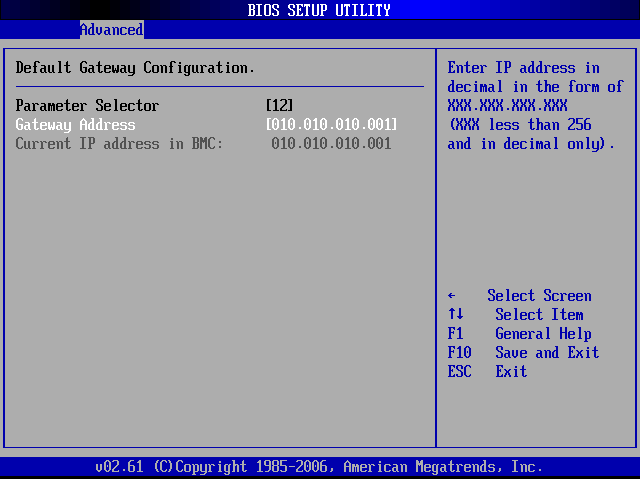
 **LAN Configuration** (Channel 01) 아래에서 **IP Address**, **Subnet Mask**,
**Gateway Address**를 설정할 수 있습니다.
**LAN Configuration** (Channel 01) 아래에서 **IP Address**, **Subnet Mask**,
**Gateway Address**를 설정할 수 있습니다.
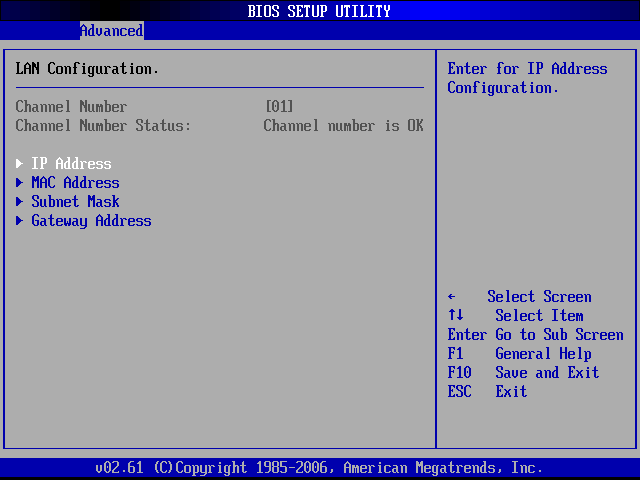 **IP Address Source**를 **Static**으로 설정한 다음, IP, 서브넷 마스크, 게이트웨이를
입력합니다. **F10**을 눌러 저장하고 종료합니다.
**IP Address Source**를 **Static**으로 설정한 다음, IP, 서브넷 마스크, 게이트웨이를
입력합니다. **F10**을 눌러 저장하고 종료합니다.
 ## 검증
ipmideck를 실행할 호스트에서:
```bash theme={null}
ipmitool -I lanplus -H -U ADMIN -P ADMIN chassis status
```
**검토용으로 표시:** Supermicro BMC 펌웨어는 X8–X12 세대 간에 많이 다르며, 이
스크린샷은 오래된 보드의 것입니다. 새 보드 (X11 / X12)에는 재설계된 웹 UI가 있습니다.
이 가이드에 의존하기 전에 특정 보드에 대해 테스트하세요.
## 출처
[CITED: supermicro.com/manuals/other/IPMI\_Users\_Guide.pdf](https://www.supermicro.com/manuals/other/IPMI_Users_Guide.pdf) ·
[Thomas-Krenn Wiki, Supermicro IPMI Configuration](https://www.thomas-krenn.com/en/wiki/Supermicro_IPMI_Configuration_through_BIOS_or_Web_Interface)
## 검증
ipmideck를 실행할 호스트에서:
```bash theme={null}
ipmitool -I lanplus -H -U ADMIN -P ADMIN chassis status
```
**검토용으로 표시:** Supermicro BMC 펌웨어는 X8–X12 세대 간에 많이 다르며, 이
스크린샷은 오래된 보드의 것입니다. 새 보드 (X11 / X12)에는 재설계된 웹 UI가 있습니다.
이 가이드에 의존하기 전에 특정 보드에 대해 테스트하세요.
## 출처
[CITED: supermicro.com/manuals/other/IPMI\_Users\_Guide.pdf](https://www.supermicro.com/manuals/other/IPMI_Users_Guide.pdf) ·
[Thomas-Krenn Wiki, Supermicro IPMI Configuration](https://www.thomas-krenn.com/en/wiki/Supermicro_IPMI_Configuration_through_BIOS_or_Web_Interface)