> ## Documentation Index
> Fetch the complete documentation index at: https://docs.ipmideck.com/llms.txt
> Use this file to discover all available pages before exploring further.
# Supermicro
> Configureer IPMI-over-LAN op een Supermicro IPMI 2.0-BMC (X8–X12-boards) via de webinterface of BIOS. Lage zekerheid, verifieer op je hardware voor gebruik.
**Gids met lage zekerheid, verifieer op je hardware voordat je op deze stappen vertrouwt.**
Supermicro-BMC-firmware verschilt aanzienlijk tussen boardgeneraties (X8 tot en met X12).
De screenshots hieronder zijn van een oudere Supermicro-BMC en BIOS; behandel de navigatie-
paden als startpunt, bevestig ze tegen je eigen board en meld correcties.
Hardwarevalidatie door de eigenaar is in afwachting.
**Van toepassing op:** Supermicro-servers met een IPMI 2.0-BMC (X8- / X9- / X10- / X11- / X12-boards).
Supermicro is **Experimenteel** met ipmideck, IPMI 2.0 werkt maar is nog niet uitputtend
getest. Op de meeste Supermicro-boards is **IPMI-over-LAN standaard ingeschakeld**; de hoofdtaak
is de BMC een bereikbaar LAN-adres geven, ofwel via de webinterface ofwel via BIOS.
## Optie A: via de BMC-webinterface
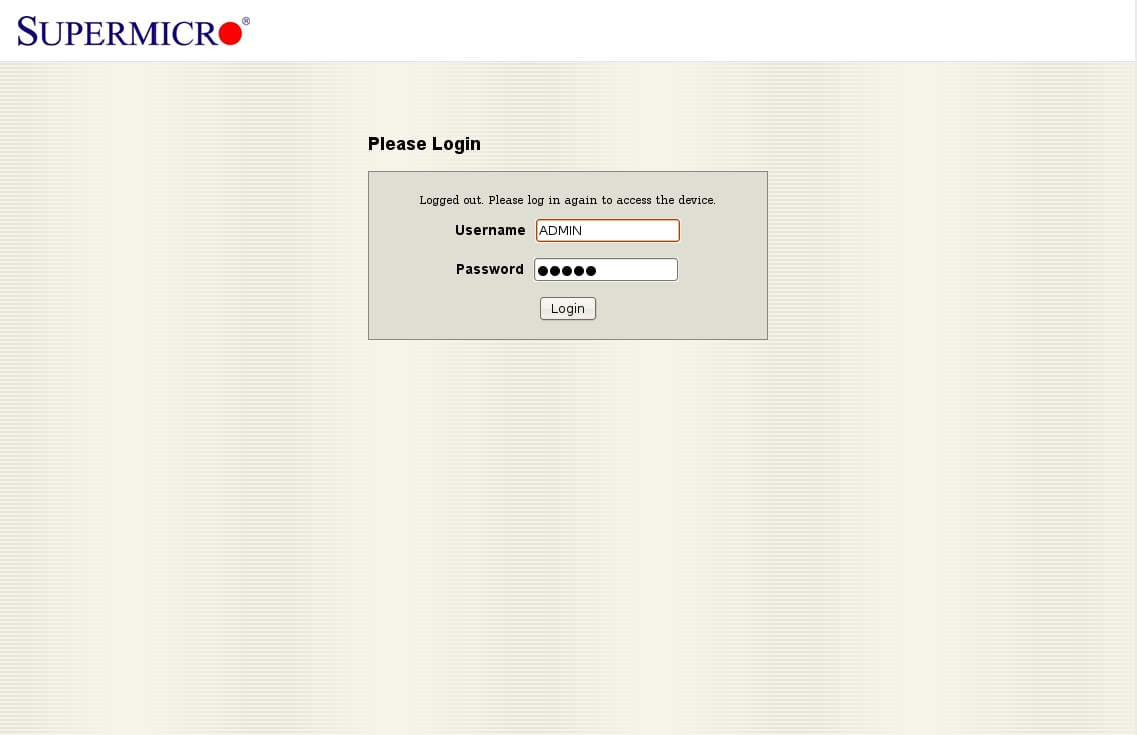
Navigeer in een browser naar het BMC-IP-adres. De standaard inloggegevens zijn
**ADMIN** / **ADMIN**, wijzig ze onmiddellijk na de eerste toegang.
 Open het tabblad **Configuration** en kies **Network** uit de lijst met opties. (Deze oudere
firmware groepeert alles onder *Configuration*; nieuwere boards labelen het mogelijk
*Network → Network Settings*.)
Open het tabblad **Configuration** en kies **Network** uit de lijst met opties. (Deze oudere
firmware groepeert alles onder *Configuration*; nieuwere boards labelen het mogelijk
*Network → Network Settings*.)
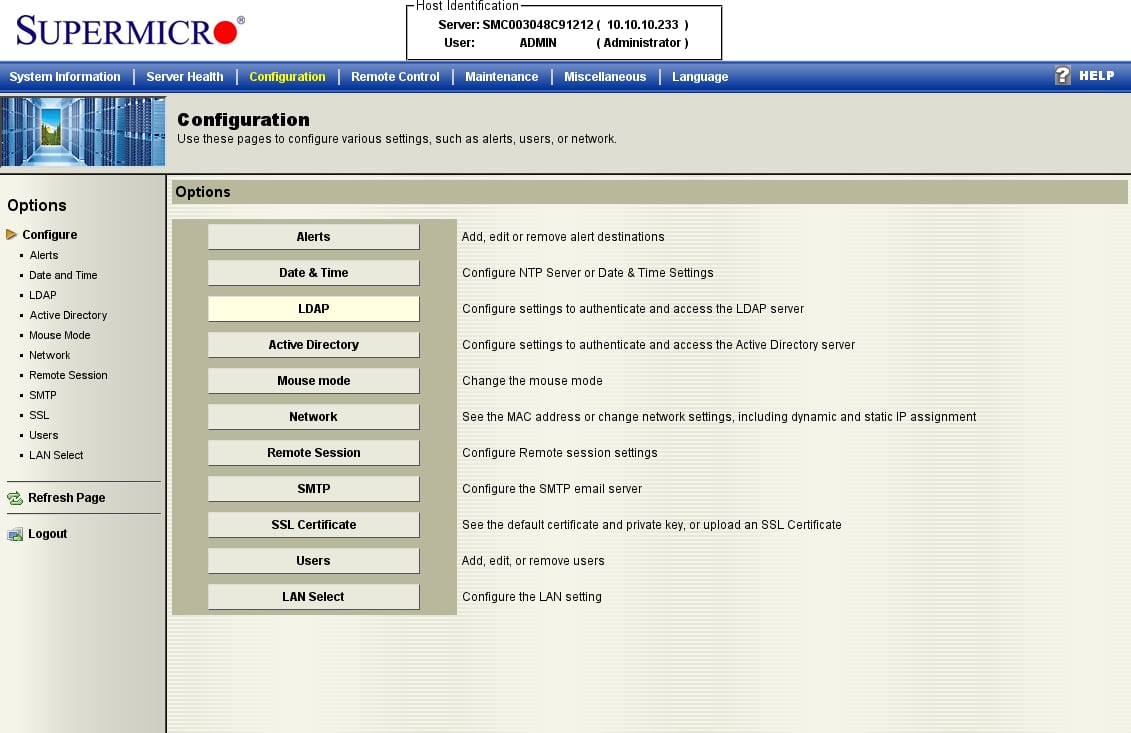 Kies **Obtain an IP address automatically (DHCP)** of **Use the following IP address**
en voer een statisch IP, subnetmasker en gateway in, klik dan op **Save**. IPMI-over-LAN is
al actief op het standaardkanaal, dit maakt de BMC alleen bereikbaar.
Kies **Obtain an IP address automatically (DHCP)** of **Use the following IP address**
en voer een statisch IP, subnetmasker en gateway in, klik dan op **Save**. IPMI-over-LAN is
al actief op het standaardkanaal, dit maakt de BMC alleen bereikbaar.
 ## Optie B: via BIOS
Als de BMC nog geen adres heeft, stel het dan in via BIOS. Druk op **DEL** tijdens POST om de
BIOS Setup Utility te openen.
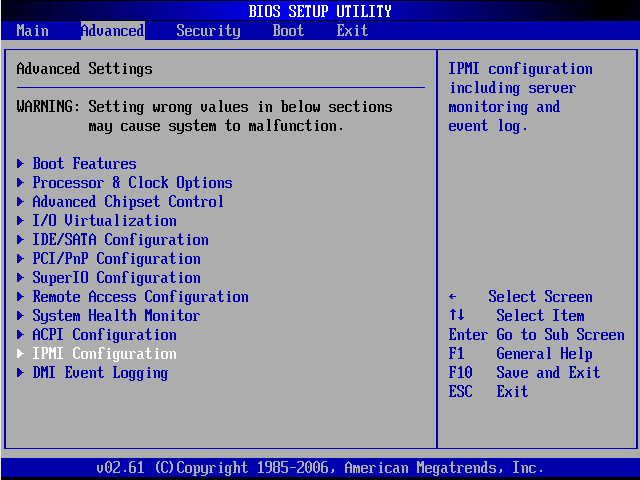
Open op het tabblad **Advanced** de optie **IPMI Configuration**.
## Optie B: via BIOS
Als de BMC nog geen adres heeft, stel het dan in via BIOS. Druk op **DEL** tijdens POST om de
BIOS Setup Utility te openen.
Open op het tabblad **Advanced** de optie **IPMI Configuration**.
 Bevestig **Status Of BMC: Working**, open dan **Set LAN Configuration**.
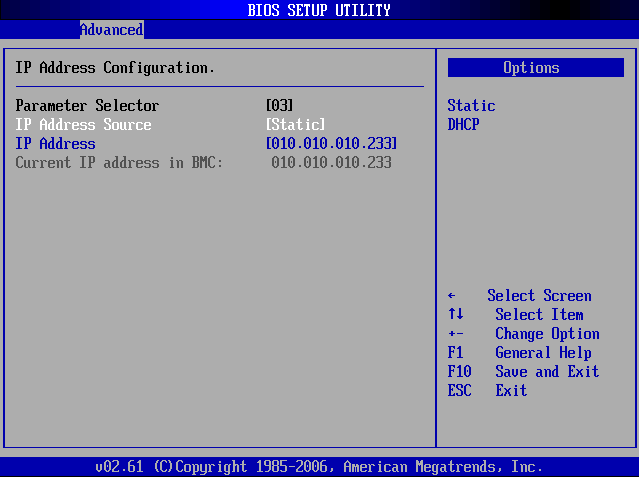
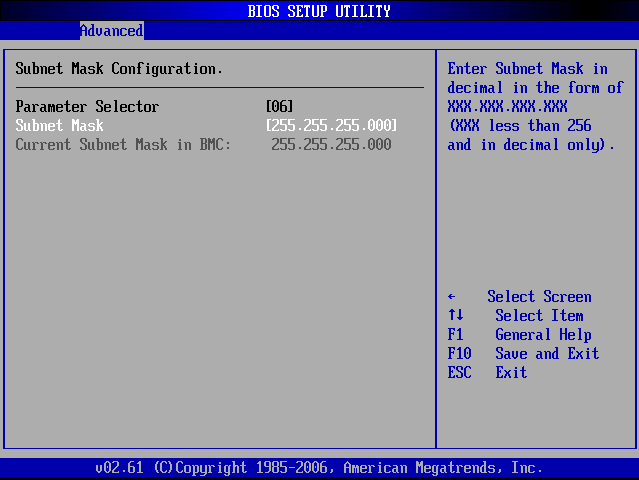
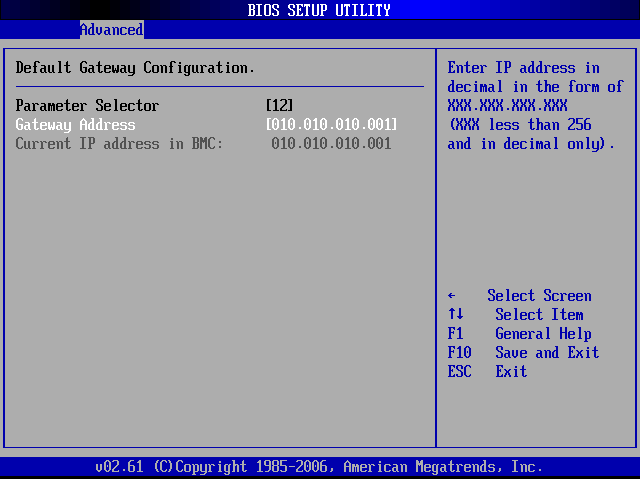
 Onder **LAN Configuration** (Channel 01) kun je het **IP Address**, **Subnet Mask**,
en **Gateway Address** instellen.
Onder **LAN Configuration** (Channel 01) kun je het **IP Address**, **Subnet Mask**,
en **Gateway Address** instellen.
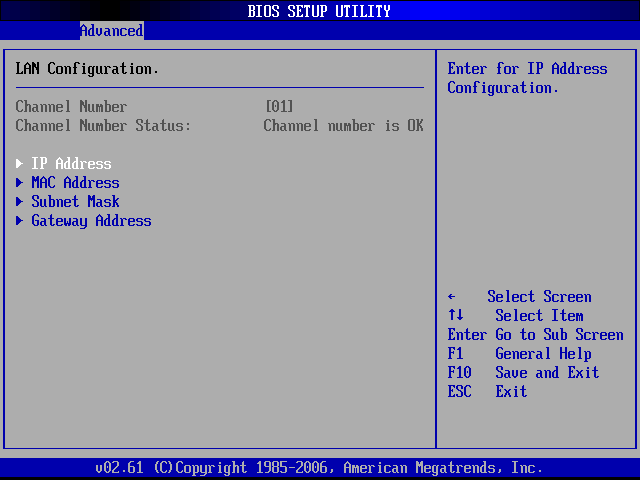 Stel **IP Address Source** in op **Static**, voer dan het IP, subnetmasker en de gateway in.
Druk op **F10** om op te slaan en af te sluiten.
Stel **IP Address Source** in op **Static**, voer dan het IP, subnetmasker en de gateway in.
Druk op **F10** om op te slaan en af te sluiten.
 ## Verifiëren
Vanaf de host die ipmideck gaat draaien:
```bash theme={null}
ipmitool -I lanplus -H -U ADMIN -P ADMIN chassis status
```
**Markering ter beoordeling:** Supermicro-BMC-firmware varieert sterk over X8–X12-generaties en
deze screenshots zijn van een ouder board. Nieuwere boards (X11 / X12) hebben een herontworpen web-
UI. Test tegen je specifieke board voordat je op deze gids vertrouwt.
## Bron
[CITED: supermicro.com/manuals/other/IPMI\_Users\_Guide.pdf](https://www.supermicro.com/manuals/other/IPMI_Users_Guide.pdf) ·
[Thomas-Krenn Wiki, Supermicro IPMI Configuration](https://www.thomas-krenn.com/en/wiki/Supermicro_IPMI_Configuration_through_BIOS_or_Web_Interface)
## Verifiëren
Vanaf de host die ipmideck gaat draaien:
```bash theme={null}
ipmitool -I lanplus -H -U ADMIN -P ADMIN chassis status
```
**Markering ter beoordeling:** Supermicro-BMC-firmware varieert sterk over X8–X12-generaties en
deze screenshots zijn van een ouder board. Nieuwere boards (X11 / X12) hebben een herontworpen web-
UI. Test tegen je specifieke board voordat je op deze gids vertrouwt.
## Bron
[CITED: supermicro.com/manuals/other/IPMI\_Users\_Guide.pdf](https://www.supermicro.com/manuals/other/IPMI_Users_Guide.pdf) ·
[Thomas-Krenn Wiki, Supermicro IPMI Configuration](https://www.thomas-krenn.com/en/wiki/Supermicro_IPMI_Configuration_through_BIOS_or_Web_Interface)