> ## Documentation Index
> Fetch the complete documentation index at: https://docs.ipmideck.com/llms.txt
> Use this file to discover all available pages before exploring further.
# Supermicro
> Configure o IPMI-over-LAN num BMC Supermicro IPMI 2.0 (placas X8–X12) pela interface web ou BIOS. Baixa confiança, verifique no seu hardware antes de usar.
**Guia de baixa confiança, verifique no seu hardware antes de confiar nestes passos.**
O firmware do BMC Supermicro difere significativamente entre gerações de placa (X8 a X12).
As capturas de ecrã abaixo são de um BMC e BIOS Supermicro mais antigos; trate os caminhos de
navegação como ponto de partida, confirme-os contra a sua própria placa e reporte correções.
A validação de hardware pelo proprietário está pendente.
**Aplica-se a:** servidores Supermicro com um BMC IPMI 2.0 (placas X8 / X9 / X10 / X11 / X12).
O Supermicro é **Experimental** com o ipmideck, o IPMI 2.0 funciona mas ainda não foi testado
exaustivamente. Na maioria das placas Supermicro **o IPMI-over-LAN está ativado por predefinição**; a tarefa principal
é dar ao BMC um endereço LAN alcançável, seja pela interface web seja pela BIOS.
## Opção A: pela interface web do BMC
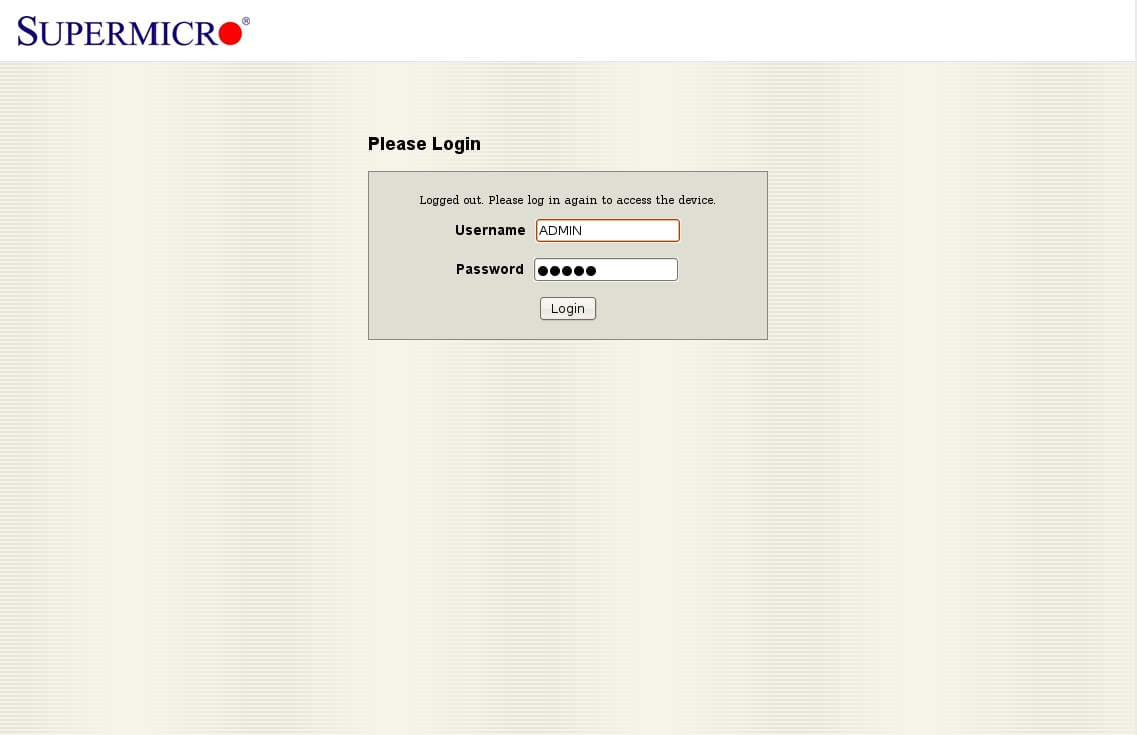
Num navegador, navegue para o endereço IP do BMC. As credenciais padrão são
**ADMIN** / **ADMIN**, mude-as imediatamente após o primeiro acesso.
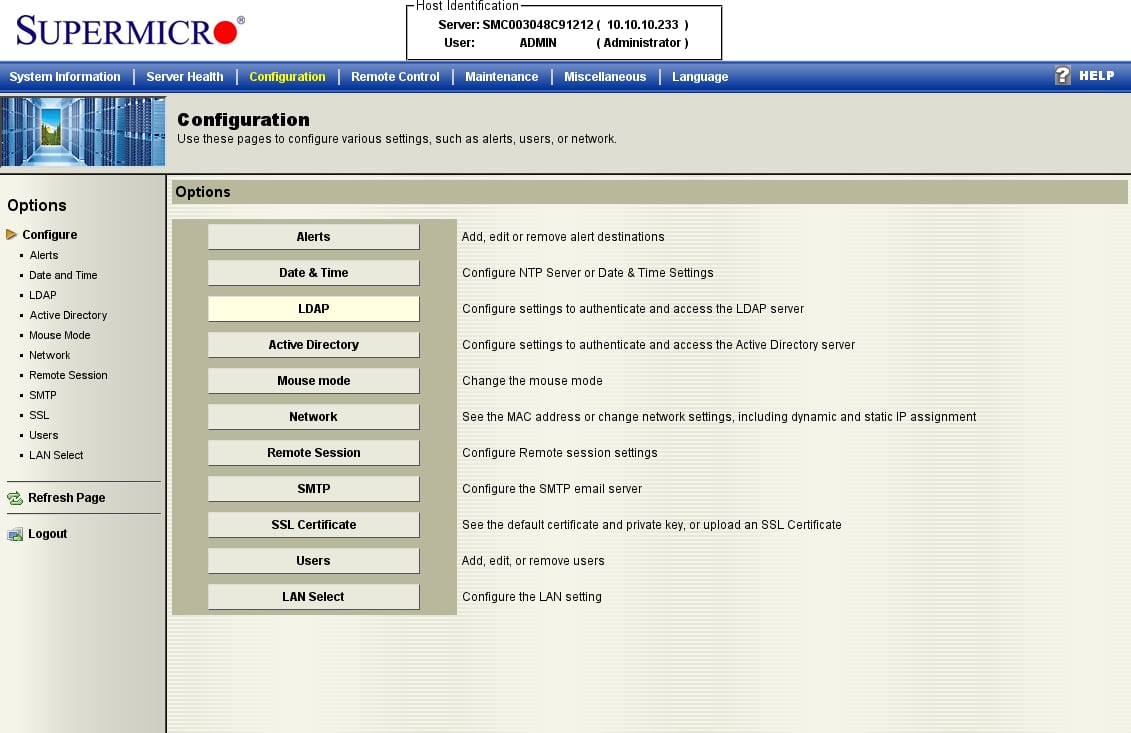
 Abra o separador **Configuration** e escolha **Network** na lista de opções. (Este firmware
mais antigo agrupa tudo sob *Configuration*; placas mais recentes podem rotulá-lo
*Network → Network Settings*.)
Abra o separador **Configuration** e escolha **Network** na lista de opções. (Este firmware
mais antigo agrupa tudo sob *Configuration*; placas mais recentes podem rotulá-lo
*Network → Network Settings*.)
 Escolha **Obtain an IP address automatically (DHCP)** ou **Use the following IP address**
e introduza um IP estático, máscara de sub-rede e gateway, depois clique em **Save**. O IPMI-over-LAN está
já ativo no canal padrão, isto apenas torna o BMC alcançável.
Escolha **Obtain an IP address automatically (DHCP)** ou **Use the following IP address**
e introduza um IP estático, máscara de sub-rede e gateway, depois clique em **Save**. O IPMI-over-LAN está
já ativo no canal padrão, isto apenas torna o BMC alcançável.
 ## Opção B: pela BIOS
Se o BMC ainda não tiver endereço, defina-o pela BIOS. Prima **DEL** durante o POST para entrar na
BIOS Setup Utility.
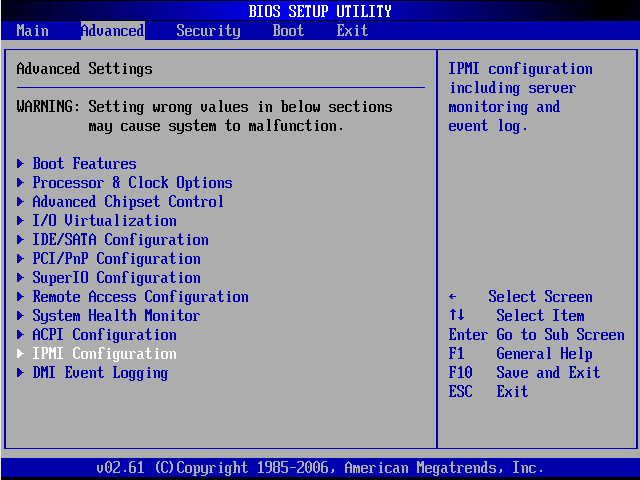
No separador **Advanced**, abra **IPMI Configuration**.
## Opção B: pela BIOS
Se o BMC ainda não tiver endereço, defina-o pela BIOS. Prima **DEL** durante o POST para entrar na
BIOS Setup Utility.
No separador **Advanced**, abra **IPMI Configuration**.
 Confirme **Status Of BMC: Working**, depois abra **Set LAN Configuration**.
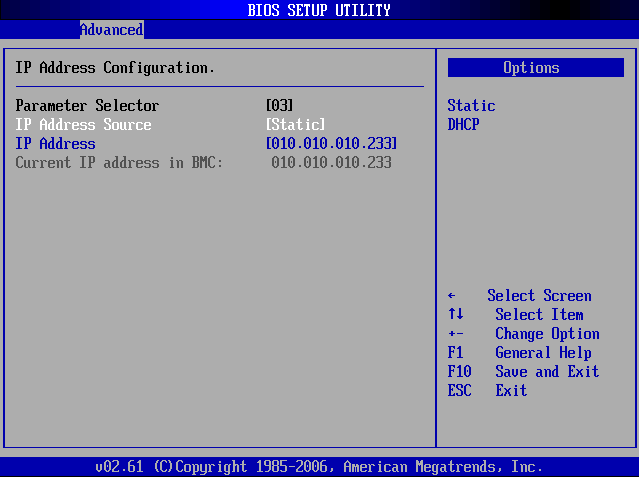
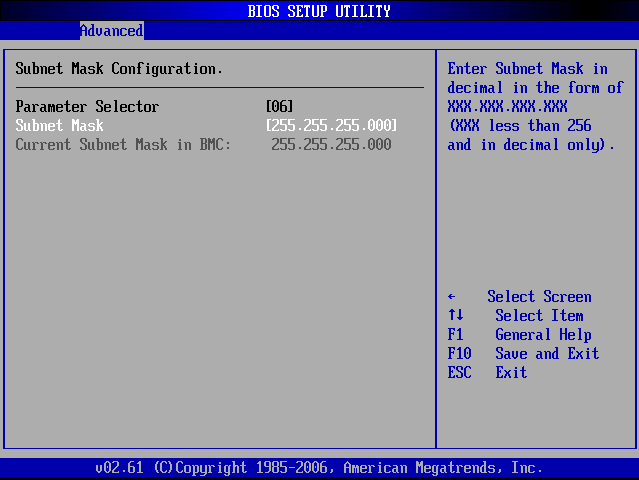
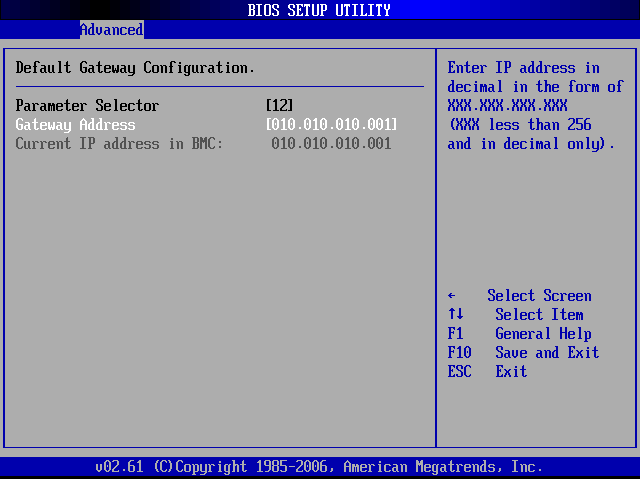
 Sob **LAN Configuration** (Channel 01) pode definir o **IP Address**, **Subnet Mask**,
e **Gateway Address**.
Sob **LAN Configuration** (Channel 01) pode definir o **IP Address**, **Subnet Mask**,
e **Gateway Address**.
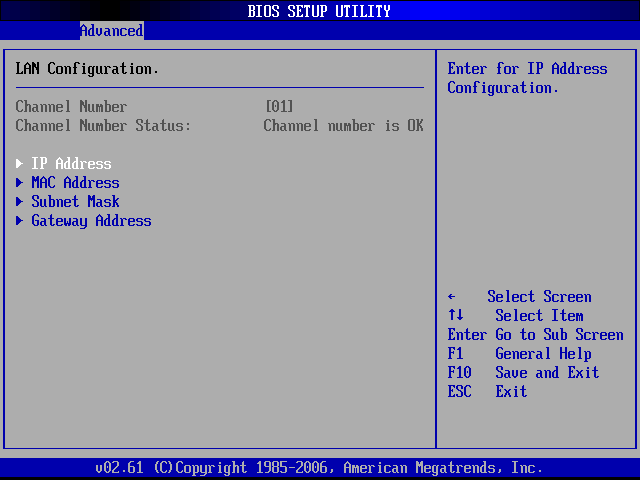 Defina **IP Address Source** para **Static**, depois introduza o IP, máscara de sub-rede e gateway.
Prima **F10** para guardar e sair.
Defina **IP Address Source** para **Static**, depois introduza o IP, máscara de sub-rede e gateway.
Prima **F10** para guardar e sair.
 ## Verificação
A partir do host que vai correr o ipmideck:
```bash theme={null}
ipmitool -I lanplus -H -U ADMIN -P ADMIN chassis status
```
**Sinalizar para revisão:** o firmware do BMC Supermicro varia muito entre gerações X8–X12 e
estas capturas de ecrã são de uma placa mais antiga. Placas mais recentes (X11 / X12) têm uma interface
web redesenhada. Teste contra a sua placa específica antes de confiar neste guia.
## Fonte
[CITED: supermicro.com/manuals/other/IPMI\_Users\_Guide.pdf](https://www.supermicro.com/manuals/other/IPMI_Users_Guide.pdf) ·
[Thomas-Krenn Wiki, Supermicro IPMI Configuration](https://www.thomas-krenn.com/en/wiki/Supermicro_IPMI_Configuration_through_BIOS_or_Web_Interface)
## Verificação
A partir do host que vai correr o ipmideck:
```bash theme={null}
ipmitool -I lanplus -H -U ADMIN -P ADMIN chassis status
```
**Sinalizar para revisão:** o firmware do BMC Supermicro varia muito entre gerações X8–X12 e
estas capturas de ecrã são de uma placa mais antiga. Placas mais recentes (X11 / X12) têm uma interface
web redesenhada. Teste contra a sua placa específica antes de confiar neste guia.
## Fonte
[CITED: supermicro.com/manuals/other/IPMI\_Users\_Guide.pdf](https://www.supermicro.com/manuals/other/IPMI_Users_Guide.pdf) ·
[Thomas-Krenn Wiki, Supermicro IPMI Configuration](https://www.thomas-krenn.com/en/wiki/Supermicro_IPMI_Configuration_through_BIOS_or_Web_Interface)