> ## Documentation Index
> Fetch the complete documentation index at: https://docs.ipmideck.com/llms.txt
> Use this file to discover all available pages before exploring further.
# Supermicro
> 通过 Web 界面或 BIOS 在 Supermicro IPMI 2.0 BMC(X8–X12 主板)上配置 IPMI-over-LAN。低置信度,使用前请在你的硬件上验证。
**低置信度指南,在依赖这些步骤之前请在你的硬件上验证。**
Supermicro BMC 固件在主板代际之间(X8 到 X12)差异显著。
下面的截图来自较旧的 Supermicro BMC 和 BIOS;请将导航
路径视为起点,针对你自己的主板确认它们,并报告更正。
所有者硬件验证尚待进行。
**适用于:** 带 IPMI 2.0 BMC 的 Supermicro 服务器(X8 / X9 / X10 / X11 / X12 主板)。
Supermicro 在 ipmideck 中为**实验性**,IPMI 2.0 可用但尚未彻底
测试。在大多数 Supermicro 主板上,**IPMI-over-LAN 默认是启用的**;主要任务
是给 BMC 一个可达的 LAN 地址,可以从 Web 界面或从 BIOS 进行。
## 选项 A:从 BMC Web 界面
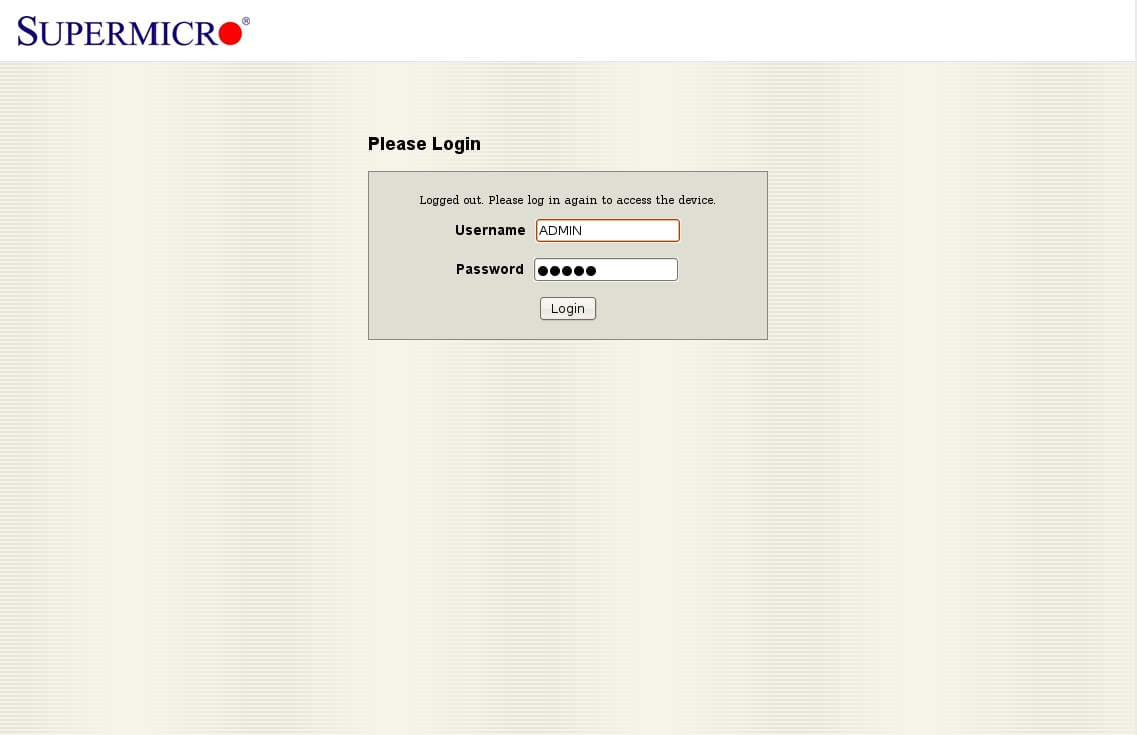
在浏览器中,导航到 BMC IP 地址。默认凭据为
**ADMIN** / **ADMIN**,首次访问后请立即更改它们。
 打开 **Configuration** 选项卡,并从选项列表中选择 **Network**。(这个较旧的
固件将所有内容分组在 *Configuration* 下;较新的主板可能将其标为
*Network → Network Settings*。)
打开 **Configuration** 选项卡,并从选项列表中选择 **Network**。(这个较旧的
固件将所有内容分组在 *Configuration* 下;较新的主板可能将其标为
*Network → Network Settings*。)
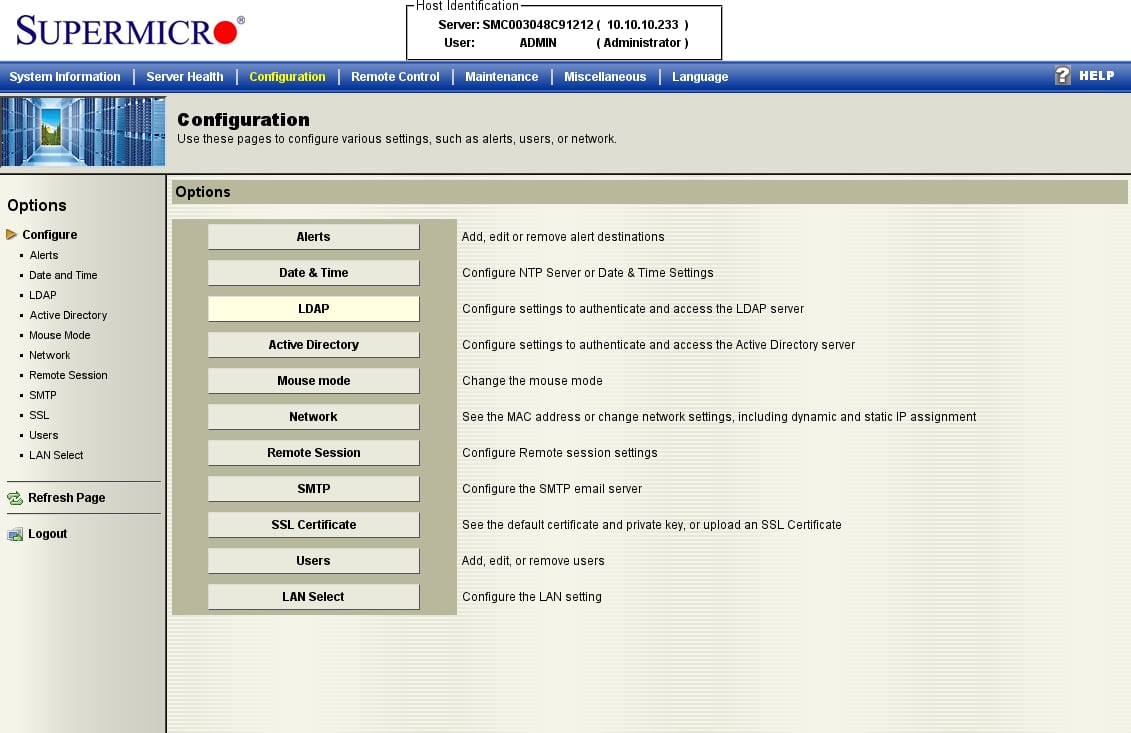 选择 **Obtain an IP address automatically (DHCP)** 或 **Use the following IP address**
并输入静态 IP、子网掩码和网关,然后点击 **Save**。IPMI-over-LAN
已在默认通道上处于激活状态,这只是让 BMC 可达。
选择 **Obtain an IP address automatically (DHCP)** 或 **Use the following IP address**
并输入静态 IP、子网掩码和网关,然后点击 **Save**。IPMI-over-LAN
已在默认通道上处于激活状态,这只是让 BMC 可达。
 ## 选项 B:从 BIOS
如果 BMC 还没有地址,请从 BIOS 设置它。在 POST 期间按 **DEL** 进入
BIOS Setup Utility。
在 **Advanced** 选项卡上,打开 **IPMI Configuration**。
## 选项 B:从 BIOS
如果 BMC 还没有地址,请从 BIOS 设置它。在 POST 期间按 **DEL** 进入
BIOS Setup Utility。
在 **Advanced** 选项卡上,打开 **IPMI Configuration**。
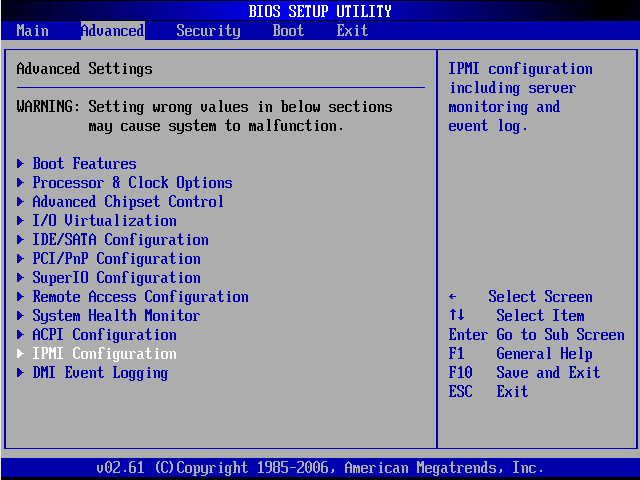 确认 **Status Of BMC: Working**,然后打开 **Set LAN Configuration**。
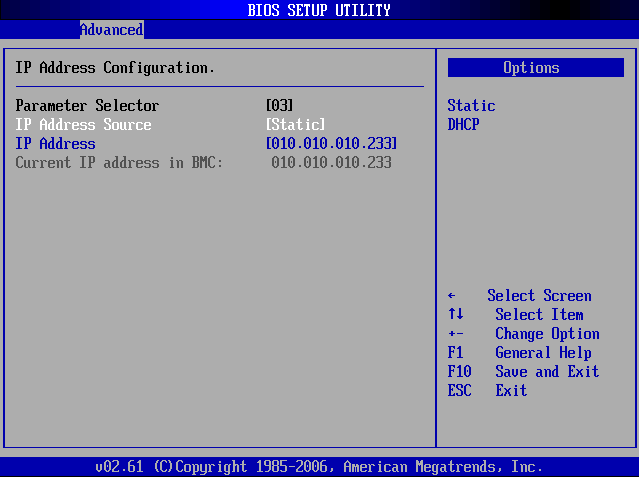
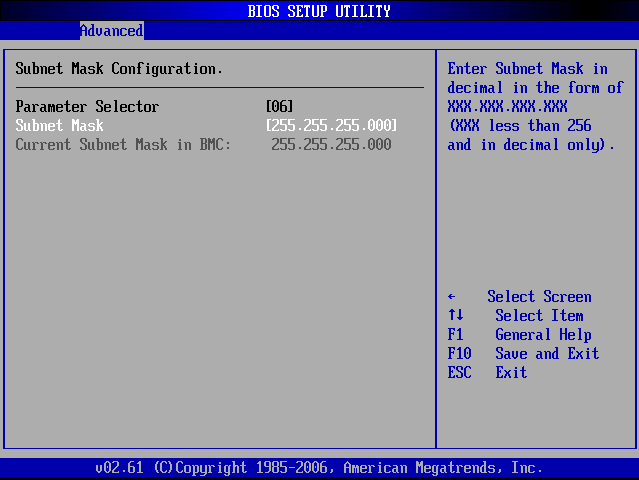
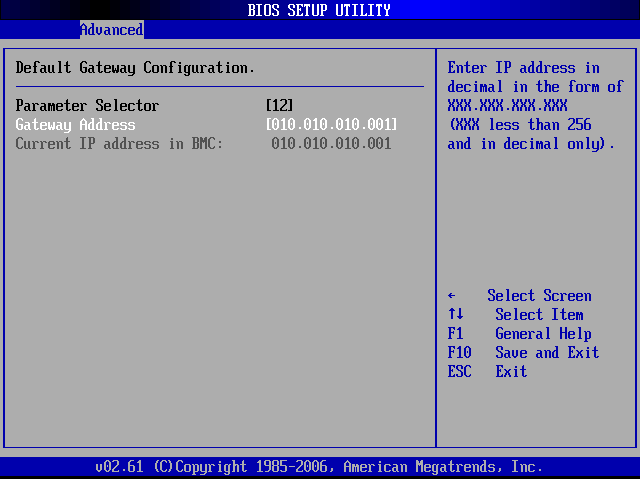
 在 **LAN Configuration**(Channel 01)下,你可以设置 **IP Address**、**Subnet Mask**
和 **Gateway Address**。
在 **LAN Configuration**(Channel 01)下,你可以设置 **IP Address**、**Subnet Mask**
和 **Gateway Address**。
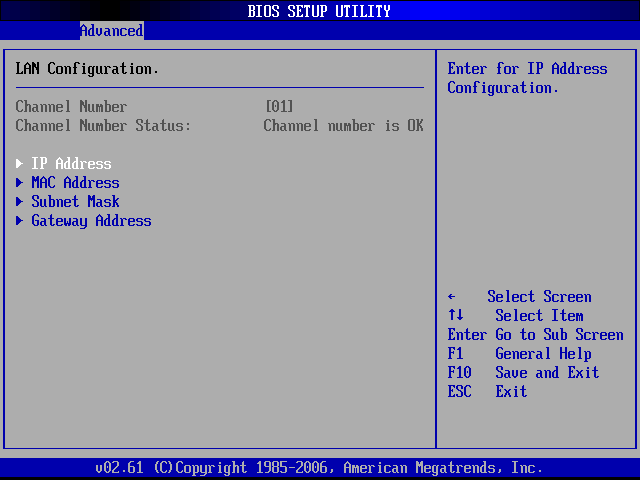 将 **IP Address Source** 设为 **Static**,然后输入 IP、子网掩码和网关。
按 **F10** 保存并退出。
将 **IP Address Source** 设为 **Static**,然后输入 IP、子网掩码和网关。
按 **F10** 保存并退出。
 ## 验证
从将运行 ipmideck 的主机:
```bash theme={null}
ipmitool -I lanplus -H -U ADMIN -P ADMIN chassis status
```
**标记以供审查:** Supermicro BMC 固件在 X8–X12 代际间差异很大,而且
这些截图来自较旧的主板。较新的主板(X11 / X12)有重新设计的 Web
UI。在依赖本指南之前,请针对你的特定主板进行测试。
## 来源
[CITED: supermicro.com/manuals/other/IPMI\_Users\_Guide.pdf](https://www.supermicro.com/manuals/other/IPMI_Users_Guide.pdf) ·
[Thomas-Krenn Wiki, Supermicro IPMI Configuration](https://www.thomas-krenn.com/en/wiki/Supermicro_IPMI_Configuration_through_BIOS_or_Web_Interface)
## 验证
从将运行 ipmideck 的主机:
```bash theme={null}
ipmitool -I lanplus -H -U ADMIN -P ADMIN chassis status
```
**标记以供审查:** Supermicro BMC 固件在 X8–X12 代际间差异很大,而且
这些截图来自较旧的主板。较新的主板(X11 / X12)有重新设计的 Web
UI。在依赖本指南之前,请针对你的特定主板进行测试。
## 来源
[CITED: supermicro.com/manuals/other/IPMI\_Users\_Guide.pdf](https://www.supermicro.com/manuals/other/IPMI_Users_Guide.pdf) ·
[Thomas-Krenn Wiki, Supermicro IPMI Configuration](https://www.thomas-krenn.com/en/wiki/Supermicro_IPMI_Configuration_through_BIOS_or_Web_Interface)