Dell iDRAC 在 ipmideck 中已支持 / 已测试。这些步骤来自 Dell 官方
文档和一台真实的 iDRAC6,请在依赖之前确认导航路径与你的 iDRAC 固件
匹配。
步骤
1
打开 iDRAC Web 界面
在浏览器中,导航到 iDRAC IP 地址(出厂默认 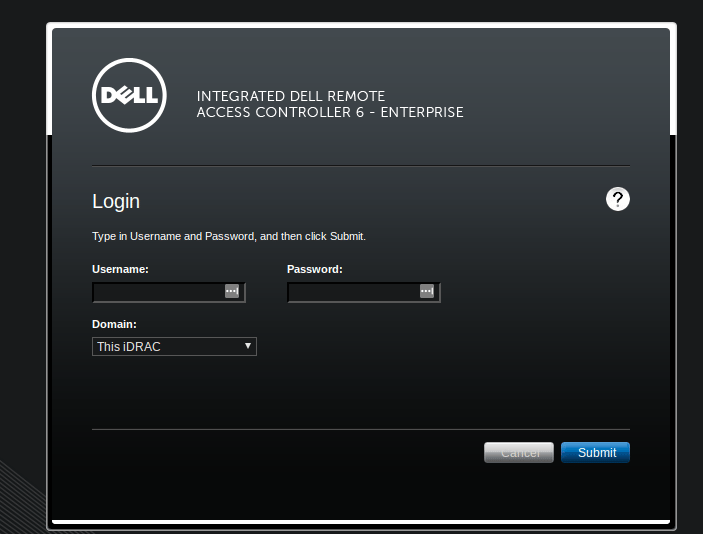
192.168.0.120)并
登录。PowerEdge 默认凭据为 root / calvin,如果它们仍在
使用中,请立即更改。The Dell iDRAC login screen (iDRAC6: Integrated Dell Remote Access Controller 6 Enterprise).
2
打开 Network/Security → Network
在左侧窗格中选择 iDRAC Settings,然后打开 Network/Security 选项卡及其
Network 子选项卡。此页面包含 IPv4 设置,再往下是
IPMI Settings。
在 iDRAC9 上,等效路径是 iDRAC Settings → Connectivity → Network。
3
启用 IPMI Over LAN
滚动到 IPMI Settings 部分并勾选 Enable IPMI Over LAN。将
Channel Privilege Level Limit 设为 Administrator(或至少 Operator),以便
ipmideck 能读取传感器并控制电源。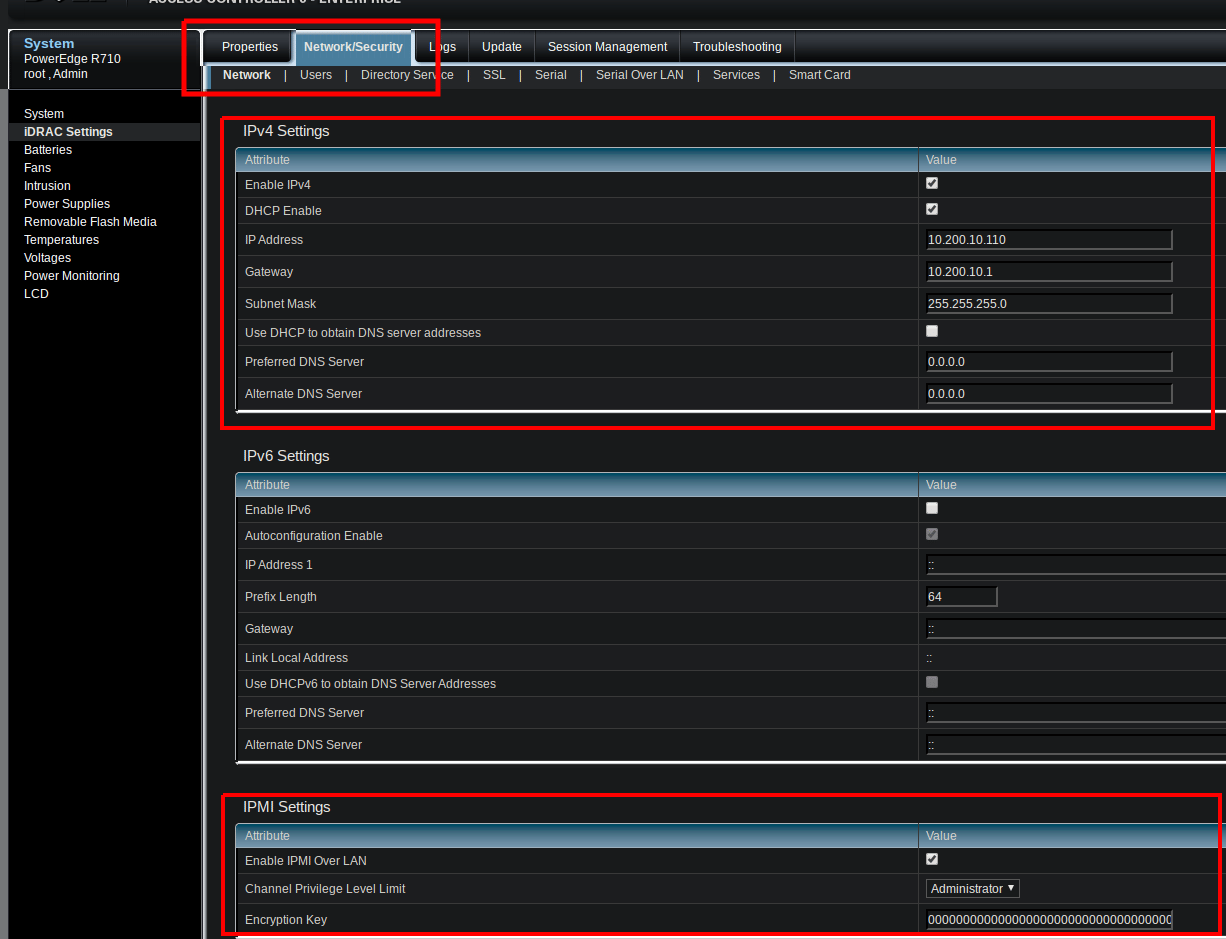
Network/Security → Network: the IPMI Settings panel with Enable IPMI Over LAN ticked and the channel privilege set to Administrator.
4
设置加密密钥(可选)
对于标准的
lanplus 会话,Encryption Key 可以保持全零(默认)。
仅在你的安全策略要求时才设置一个 40 字符的十六进制密钥。5
应用
点击 Apply 保存更改。
6
验证 IPMI 已启用
回到 Properties → iDRAC Settings → iDRAC Information,确认 LAN Enabled: Yes
和 IPMI Version: 2.0。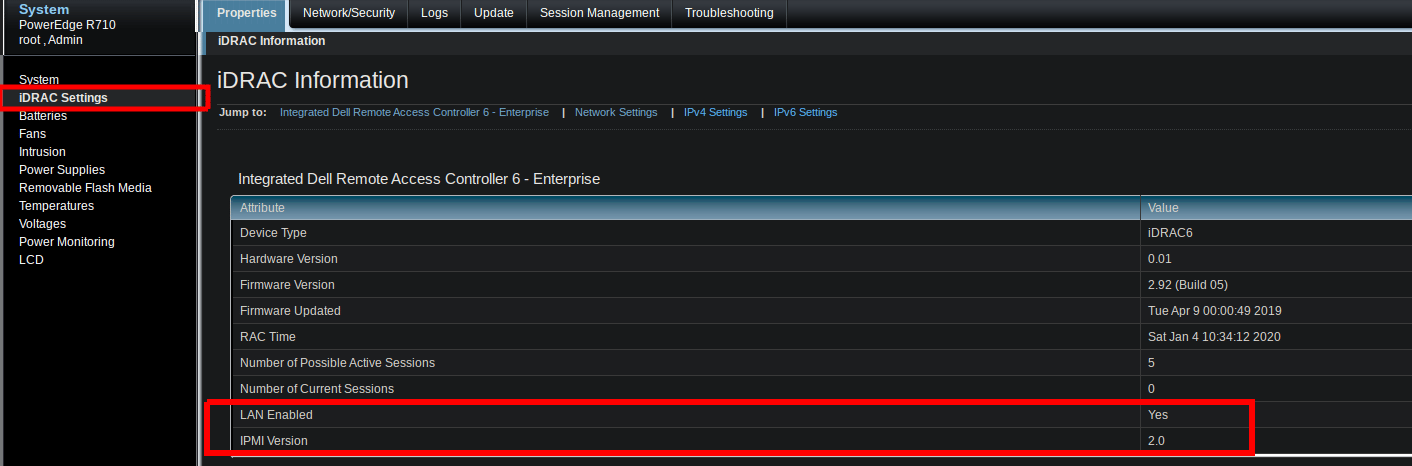
iDRAC Information confirms LAN Enabled: Yes and IPMI Version: 2.0.
路径因代际而异: iDRAC6 / iDRAC7 / iDRAC8 使用 Network/Security → Network →
IPMI Settings(如上所示),而 iDRAC9 使用 iDRAC Settings → Connectivity → Network。
请针对你的硬件验证确切路径。